Jupyter Notebook Pdf 변환 시 문제 해결하기
Jupyter Notebook Pdf 변환하기
Jupyter Notebook으로 강의자료를 만들고 pdf 변환을 시도하던 중, 여러 문제들이 있어 해결하고 각각의 해결 방안을 공유하고자 한다. Jupyter Notebook을 아나콘다(miniforge3) 환경에서 사용하기 때문에, 각자 로컬환경에 따라 유동적으로 경로나 이름 등을 확인하면 될 것 같다.
Jupyter > Latex > pdf
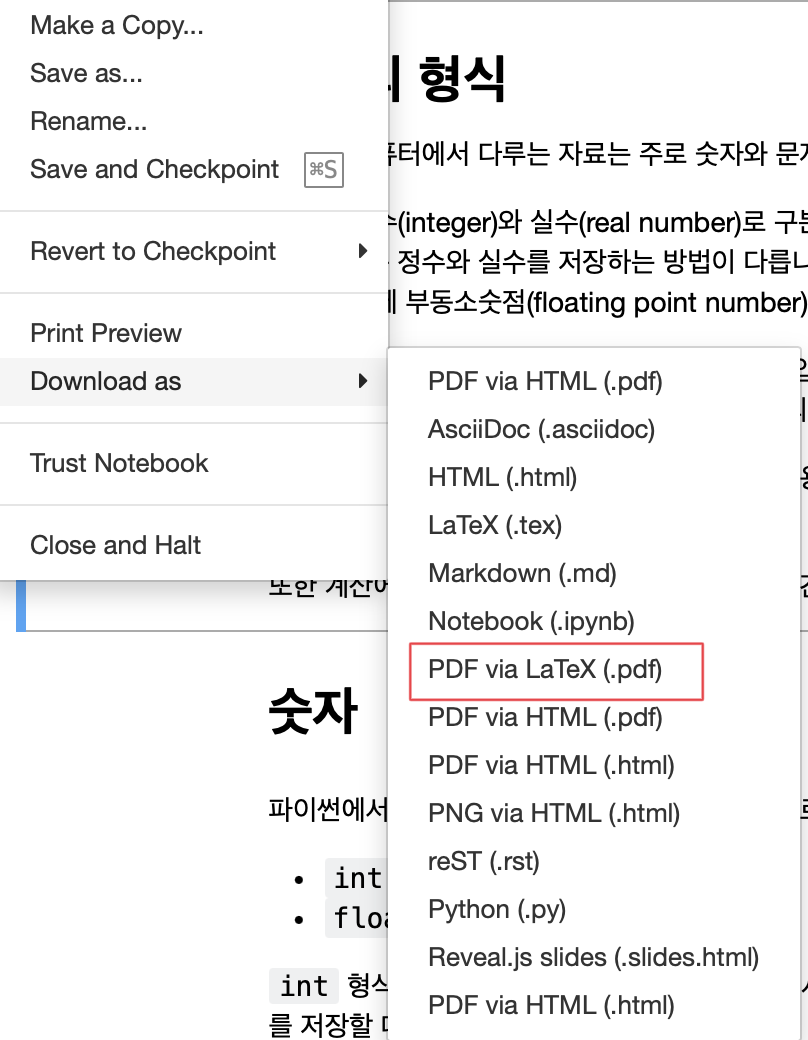
일반적으로 Jupyter Notebook을 실행하고 pdf로 변환하고자 할 때, 주로 다음과 같이 Download as > PDF via LaTeX 를 이용할 것이다. 이때 Latex을 변환하는 과정에서 Tex 프로그램의 설치가 요구되는데, 윈도우의 경우는 miktex를 이용하면 된다고 하고 맥 환경에서는 mactex를 설치해주어야 한다.
brew install mactex
을 이용해 맥용 Tex 환경을 구축한 후, 변환에 필요한 다른 패키지들을 차근차근 설치하면 된다. 문제는, 문서에 한글이 있을 경우 인코딩이 되지 않아 출력 자체가 안되는 문제가 발생하는데, 이를 해결하기 위해 다음과 같은 작업을 해주어야 한다.
(맥 기준) 우선, 터미널에 다음과 같이 입력하자.
jupyter --path
그럼 다음과 같이 결과가 나오는데, 여기서 config 폴더가 있는 경로 중 사용자명/.jupyter 경로로 들어가자.
config:
    /Users/{사용자명}/.jupyter
    /Users/{사용자명}/.local/etc/jupyter
    /Users/{사용자명}/miniforge3/etc/jupyter
    /usr/local/etc/jupyter
    /etc/jupyter
data:
    /Users/{사용자명}/Library/Jupyter
    /Users/{사용자명}/.local/share/jupyter
    /Users/{사용자명}/miniforge3/share/jupyter
    /usr/local/share/jupyter
    /usr/share/jupyter
runtime:
    /Users/{사용자명}/Library/Jupyter/runtime
이제, .jupyter 폴더 안에 다음과 같은 내용을 가진 jupyter_notebook_config.py 파일을 생성하자.
import os

c.LatexExporter.template_file = 'hangul'
c.PDFExporter.latex_count = 3
c.PDFExporter.template_file = 'hangul'
c.PDFExporter.latex_command = ['xelatex', '{filename}']
다음으로, nbconvert 프로그램이 변환할 때 사용하는 템플릿 폴더를 찾아야 하는데, 이는 로컬의 아나콘다 환경에 따라 다르지만, 필자는 miniforge3 환경에서 다음과 같은 경로에서 확인할 수 있었다. 아마 anaconda 환경이면 anaconda/share 에서 확인가능할 것이다.
/Users/{사용자명}/miniforge3/share/jupyter/nbconvert/templates
이제 해당 폴더의 구조를 살펴보면 다음과 같은데,
├── asciidoc
│   ├── conf.json
│   └── index.asciidoc.j2
├── base
│   ├── cell_id_anchor.j2
│   ├── celltags.j2
│   ├── display_priority.j2
│   ├── jupyter_widgets.html.j2
│   ├── mathjax.html.j2
│   └── null.j2
├── basic
│   ├── conf.json
│   └── index.html.j2
├── classic
│   ├── base.html.j2
│   ├── conf.json
│   ├── index.html.j2
│   └── static
│       └── style.css
├── compatibility
│   ├── display_priority.tpl
│   └── full.tpl
├── lab
│   ├── base.html.j2
│   ├── conf.json
│   ├── index.html.j2
│   ├── mermaidjs.html.j2
│   └── static
│       ├── index.css
│       ├── theme-dark.css
│       └── theme-light.css
├── latex
│   ├── base.tex.j2
│   ├── conf.json
│   ├── display_priority.j2
│   ├── document_contents.tex.j2
│   ├── hangul.tex.j2
│   ├── index.tex.j2
│   ├── null.j2
│   ├── report.tex.j2
│   ├── style_bw_ipython.tex.j2
│   ├── style_bw_python.tex.j2
│   ├── style_ipython.tex.j2
│   ├── style_jupyter.tex.j2
│   ├── style_jupyter.tplx
│   └── style_python.tex.j2
├── markdown
│   ├── conf.json
│   └── index.md.j2
├── python
│   ├── conf.json
│   └── index.py.j2
├── reveal
│   ├── base.html.j2
│   ├── cellslidedata.j2
│   ├── conf.json
│   ├── index.html.j2
│   └── static
│       └── custom_reveal.css
├── rst
│   ├── conf.json
│   └── index.rst.j2
├── script
│   ├── conf.json
│   └── script.j2
└── webpdf
    ├── conf.json
    └── index.pdf.j2
이제 위 폴더 중 latex 폴더에 들어가자. 그리고 폴더 내부에 다음과 같은 파일 hangul.tex.j2 를 만들자.
((=- Default to the notebook output style -=))
 ((*- if not cell_style is defined -*))
     ((* set cell_style = 'style_jupyter.tex.j2' *))
 ((*- endif -*))

 ((=- Inherit from the specified cell style. -=))
 ((* extends cell_style *))


 %===============================================================
 % Latex Article
 %===============================================================

 ((*- block docclass -*))
 \documentclass[11pt]{article}
 \usepackage{kotex}
 ((*- endblock docclass -*))
그러면, 처음 보았던 주피터 노트북의 PDF via LaTex 다운로드 옵션이 잘 작동하게 된다.
html > PDF 출력 시 글자 잘림
만일 Latex 환경 설치에 어려움이 있는 경우, jupyter notebook을 html로 바꾼 뒤 pdf로 변환하는 방법을 사용할 수 있다.
우선 다음 명령어로 노트북 파일을 html로 바꾼 뒤, 웹브라우저에 접속해서 해당 파일을 프린트하여 pdf로 저장하자.
jupyter nbconvert --to html notebook.ipynb
그런데, 위 코드로 생성한 html 파일은 코드 셀의 특정 행이 길어질 경우 잘림 현상이 발생한다. 이 경우 pdf로 출력하여도 코드가 잘려 온전한 파일을 생성하지 못한다. 이를 해결하기 위해서는 위에서 살펴본 템플릿 파일에 수정이 필요하다.
위 코드처럼 --template= 옵션을 사용하지 않고 기본 템플릿으로 html 변환을 하게 될 경우 템플릿 lab을 이용하는데 해당 템플릿의 폴더는 아래 경로에서 찾을 수 있다.
/Users/{사용자명}/miniforge3/share/jupyter/nbconvert/templates/lab
해당 폴더에는 다음과 같은 파일들이 있는데, 여기서 index.css 파일을 수정하자.
.
├── base.html.j2
├── conf.json
├── index.html.j2
├── mermaidjs.html.j2
└── static
    ├── index.css
    ├── theme-dark.css
    └── theme-light.css
index.css 파일을 열면 중간에 다음과 같이 Printing 옵션이 설정된 것을 볼 수 있다.
/*-----------------------------------------------------------------
| Printing
|-------------------------------------------------------------------*/

@media print {
  .jp-OutputArea-child {
    break-inside: avoid-page;
  }
}
여기에 다음과 같이 pre 엘리먼트에 대한 줄바꿈 옵션을 설정해주자.
/*----------------------------------------------------------------
| Printing
|----------------------------------------------------------------*/

@media print {
  .jp-OutputArea-child {
    break-inside: avoid-page;
  }

  pre {
    word-break: break-all !important;
    word-wrap: break-word !important;
    white-space: pre-wrap !important;
  }
}
이후 다시 jupyter nbconvert 옵션으로 html 변환 후 pdf 출력 시, 더이상 코드셀의 텍스트가 잘리지 않고 정상적으로 출력됨을 확인할 수 있다.
Leave a comment